






 Strains
 Guide
Guide Strumenti
 Supporto





Guide alla coltivazione
Come utilizzare un sacchetto pronto per la coltivazione di funghi allucinogeni: guida completa
A Sacchetto pronto all'uso per funghi allucinogeni rende la coltivazione dei funghi accessibile senza richiedere inoculazione, incubazione o preparazione del substrato. Il substrato all’interno del sacchetto è già stato inoculato professionalmente e completamente colonizzato prima della consegna, il che significa che è pronto per entrare immediatamente nella fase di fruttificazione. Tuttavia, “pronto per la coltivazione” non significa che le condizioni di coltivazione possano essere ignorate. Temperatura, luce indiretta, ricambio d’aria, pulizia e raccolta corretta influenzano tutti lo sviluppo del sacchetto. Questa guida completa spiega come utilizzare il sacchetto Mondo Ready-to-Grow, dalla prima ispezione alla raccolta e ai raccolti successivi.

Se non hai ancora scelto una varietà, dai un’occhiata a tutte Sacche Ready-to-Grow per Funghi Magici oppure confronta le loro caratteristiche nel nostro Biblioteca dei ceppi di funghi magici.
Preferisci una guida stampabile? Visualizza o scarica il documento ufficiale Manuale delle buste "Ready-to-Grow" di Mondo (PDF).
Che cos’è una bustina pronta per la coltivazione di funghi allucinogeni?
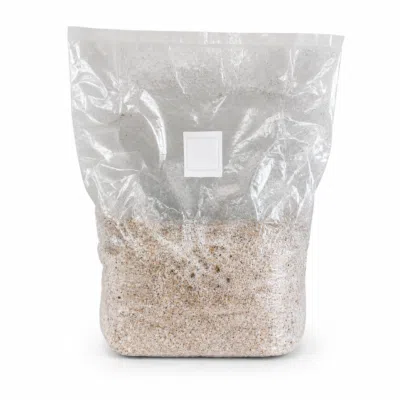
Un sacchetto "Ready-to-Grow" di Mondo è un sistema di coltivazione completo contenente circa 2,1 kg di substrato preparato in modo professionale e completamente colonizzato. L'inoculazione e l'incubazione sono già state effettuate in condizioni controllate.
Non è necessario iniettare spore o coltura liquida, mescolare il substrato, mettere in ammollo il sacchetto oppure trasferirne il contenuto in un altro contenitore. I funghi crescono direttamente dal substrato colonizzato all’interno del sacchetto in dotazione.
Ogni sacchetto "Ready-to-Grow" contiene:
- Un blocco di substrato completamente colonizzato all'interno di un sacchetto di coltivazione trasparente
- Una toppa filtrante traspirante integrata nella borsa
- Un angolo superiore pretagliato per un ricambio controllato di aria fresca
- Un adesivo di risigillatura che copre l’apertura pretagliata
- Un elastico fissato attorno al substrato per contribuire a ridurre i perni laterali
L'elastico e l'adesivo richiudibile sono parti funzionali del sistema di coltivazione. Non rimuovere l'elastico e mantenere chiuso l'angolo pretagliato fino alla comparsa dei primi germogli.
Cosa ti serve prima di iniziare?
La confezione contiene quasi tutto il necessario per la coltivazione. Prima di utilizzarla, procurati:
- Sapone antibatterico
- Disinfettante per il piano di lavoro
- Forbici pulite per aprire il sacco durante la raccolta
- Una molletta pulita o del nastro adesivo adatto per richiudere il sacchetto dopo la raccolta
- Clean disposable gloves and a face mask for additional protection, if available
No siringa per spore, liquid culture, additional substrate or spray bottle is required.
Fase 1: Controllare la borsa prima di iniziare
Always inspect the Ready-to-Grow Bag before placing it into fruiting conditions. Look at the substrate through the transparent plastic without opening the bag.
Come si presenta un micelio sano
Healthy mycelium is generally white to yellowish-white. It can look thin and web-like in some areas and thicker or fluffier in others. The bag should be intact, without tears, punctures or broken seals.
Quando non bisogna aprire la busta
Do not open or activate the bag if you see unusual green, black, red or pink growth. You should also stop if the bag is torn, damaged or no longer properly sealed.
If something looks unusual, keep the bag closed and take clear photographs of the top and sides. Use the Centro di risoluzione dei problemi di Mondo to assess the situation or contact our support team for assistance.
Blue or blue-grey areas are not automatically contaminazione. They can sometimes be caused by bruising of the mycelium. Avoid touching or disturbing the substrate unnecessarily.
Fase 2: Lavati le mani e pulisci l'area di lavoro
Clean handling is important every time you touch the bag.
- Wash your hands and forearms thoroughly with antibacterial soap.
- Clean and disinfect the work surface.
- Tie back long hair.
- Keep windows closed and avoid strong draughts while handling the bag.
- Use clean gloves and a face mask for additional protection if available.
Do not open the bag to inspect, smell or touch the substrate. Unnecessary handling increases the risk of introducing contaminants.
Fase 3: Scegliere il luogo giusto per la coltivazione
Place the unopened bag upright in a clean location with stable conditions.
Temperatura ideale
Keep the Ready-to-Grow Bag at a stable temperature between 23 and 27°C. Never allow the temperature to rise above 27°C.
A room that is slightly too cool may slow development. If additional warmth is required, use a suitable heat mat carefully and avoid direct contact between an unprotected heat mat and the substrate.
Illuminazione corretta
Provide bright, indirect light. The bag does not need intense light, but it should receive a natural day-and-night rhythm.
Never place the bag in direct sunlight. Direct sunlight can raise the temperature quickly and dry or damage the mycelium. If the room does not receive suitable daylight, a mushroom grow light can be used.
Tieni la busta chiusa finché non compaiono le puntine
Do not peel back the sticker or open the pre-cut corner before the first pins appear. The sealed bag maintains the humidity needed during the early fruiting stage.
Opening the bag too early can release humidity and slow development.
Fase 4: Attendere i primi segnali
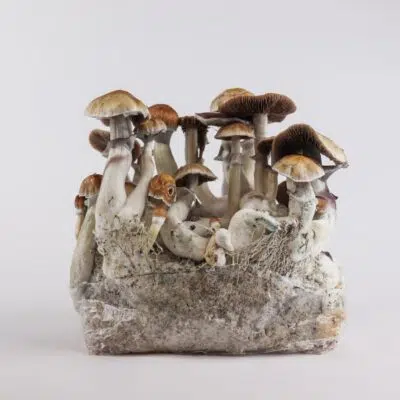
Pins are the first visible stage of mushroom development. They usually appear as small, pale knobs emerging from the surface of the colonised substrate.
Every bag develops at its own pace. Strain, temperature, light and environmental stability can all affect how quickly pins appear. Follow the development inside the bag rather than relying on a fixed number of days.
If nothing appears immediately:
- Check that the temperature remains between 23 and 27°C
- Make sure the bag receives bright, indirect light
- Confirm that the bag is still closed
- Avoid moving or handling it unnecessarily
- Give the mycelium additional time
You can record the progress of your bag and receive stage-specific guidance through the Mondo Grow Tracker.
Fase 5: Avviare il ricambio d’aria
Fresh-air exchange should begin only after the first pins are visible.
- Wash your hands and forearms and disinfect the work surface.
- Carefully peel back the resealing sticker covering the pre-cut corner.
- Allow fresh air to enter through the opening for a short period.
- Press the sticker firmly back over the opening afterward.
- Repeat this process between one and three times per day.
Short and controlled air exchanges are better than leaving the corner permanently open. Closing the opening again helps the bag retain humidity.
Do not cut a second opening and do not cut through the filter patch. The pre-cut corner is the designated opening for fresh-air exchange.
Segnali che potrebbero indicare la necessità di maggiore aria fresca
Insufficient fresh-air exchange can contribute to:
- Long, thin or misshapen mushrooms
- Stalled development after pins have appeared
- Deformed fruiting bodies
- Excessively humid conditions around the opening
If development appears restricted, make each air exchange slightly longer. Do not leave the corner continuously open, as this can reduce humidity too quickly.
Perché l'elastico dovrebbe rimanere al suo posto?
The elastic band fitted around the lower part of the bag should remain in place throughout the entire growing process.
It presses the plastic against the sides of the substrate and reduces the open, humid space in which side pins can form. Side pins are mushrooms that grow between the substrate and the plastic instead of from the top surface.
Do not remove or loosen the elastic band. If mushrooms still form along the sides, read our guide to mushroom side pins and what to do about them.
Fase 6: Lasciare che i funghi si sviluppino
Once fresh-air exchange has started, continue providing stable temperature, indirect light and one to three short air exchanges per day.
During this stage:
- Keep the bag between 23 and 27°C
- Keep it away from direct sunlight and radiators
- Do not spray water into the bag
- Do not touch the mushrooms or substrate
- Keep the elastic band in place
- Close the sticker after every air exchange
- Avoid moving the bag unnecessarily
The mushrooms now primarily need fresh air, suitable light and stable environmental conditions. More handling does not make them grow faster and can increase contamination risk.
Fase 7: Sapere quando raccogliere
The best moment to harvest is when the veil underneath the mushroom cap begins to tear and the cap starts opening.
È troppo presto
If the cap remains closed and the veil is completely intact, allow the mushroom to continue developing.
Momento ideale per la raccolta
Harvest when the veil has started to tear or has only recently torn and the cap is beginning to open.
Troppo tardi
If the cap is fully open, the mushroom may begin releasing spore. Heavy spore release can leave a dark deposit over the mushrooms and inside the bag.
For more detail about recognising the correct moment and removing mushrooms safely, read our complete guide on Come raccogliere i funghi allucinogeni.
Passaggio 8: Come raccogliere il prodotto dal sacchetto
Before harvesting, wash your hands and forearms and disinfect the work surface again.
- Use clean scissors to cut off the entire sealed top section of the bag.
- Create enough access to reach the mushrooms without crushing them.
- Hold each mushroom carefully near its base.
- Gently twist and pull it away from the substrate.
- Remove all mature mushrooms and remaining mushroom stumps.
- Avoid digging into or damaging the substrate.
Do not attempt to harvest the entire flush through the small pre-cut ventilation corner. Opening the top provides safer and easier access.
Passaggio 9: Preparare la sacca per un altro lavaggio
A healthy Ready-to-Grow Bag can produce another flush after the first harvest. Later flushes are often smaller, and the number of additional flushes cannot be guaranteed.
After harvesting:
- Make sure all mushroom stumps and remaining fruiting bodies have been removed.
- Close the cut top of the bag securely with a clean clip or suitable tape.
- Press out excessive air while retaining enough humidity inside the bag.
- Return the bag to the same bright location with indirect light.
- Maintain a stable temperature between 23 and 27°C.
- Wait for new pins and repeat the fresh-air and harvesting steps.
No soaking is required for the Mondo Ready-to-Grow Bag. Do not remove the substrate or transfer it to another container.
Continue only while the substrate remains healthy. Stop using the bag if contamination appears or the substrate clearly deteriorates.
Problemi comuni relativi ai sacchetti "Ready-to-Grow"
La crescita è lenta oppure non sta succedendo nulla
Check the temperature and lighting first. Keep the bag closed if no pins have appeared and avoid unnecessary handling. Some strains develop more slowly than others.
I germogli spuntano ma non raggiungono la maturità
Confirm that the room is between 23 and 27°C. Provide bright indirect light and make the controlled air exchanges slightly longer.
I funghi hanno un aspetto allungato o deformato
This often indicates insufficient fresh-air exchange. Increase the duration of each short air exchange without leaving the bag permanently open.
I funghi crescono ai lati
Make sure the elastic band remains tight around the substrate. Side pins are not automatically harmful, but they can be more difficult to monitor and harvest.
Il substrato presenta delle aree blu
Blue or blue-grey colouring can be caused by bruising. Avoid handling the substrate and monitor the affected area. Rapidly spreading green, black, red or pink growth is more concerning.
Possibile contaminazione
Keep the bag closed and separate it from other cultivation products. Take clear photographs of the top and sides and use the Centro di risoluzione dei problemi di Mondo. Do not try to clean or rescue contaminated substrate.
Errori importanti da evitare
- Do not open the pre-cut corner before pins appear
- Do not remove or loosen the elastic band
- Do not place the bag in direct sunlight
- Do not allow the temperature to exceed 27°C
- Do not spray water into the bag
- Do not cut through the filter patch
- Do not leave the ventilation corner permanently open
- Do not touch or break apart the substrate
- Do not transfer the substrate into another container
- Do not over-handle the bag
Scegli il tuo sacchetto pronto per la coltivazione
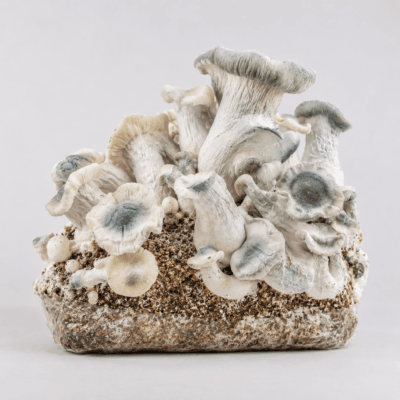
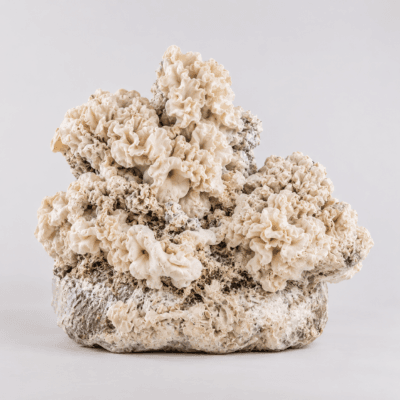
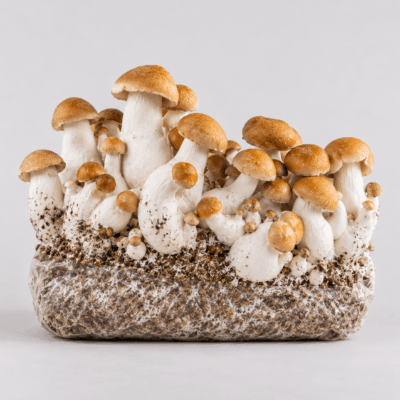
Mondo Ready-to-Grow Bags are available in a growing selection of classic and modern Psilocybe cubensis varieties. Each bag contains approximately 2.1 kg of fully colonised substrate and requires no customer inoculation.
Not sure which variety suits your experience level? Use the Consulente di prodotto Mondo or compare strains in the Biblioteca dei ceppi di funghi magici.
✓ In magazzino
✓ In magazzino
✓ In magazzino
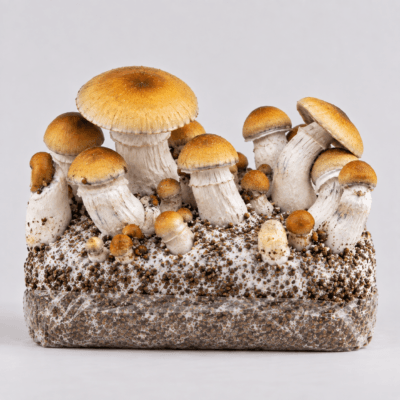
✓ In magazzino
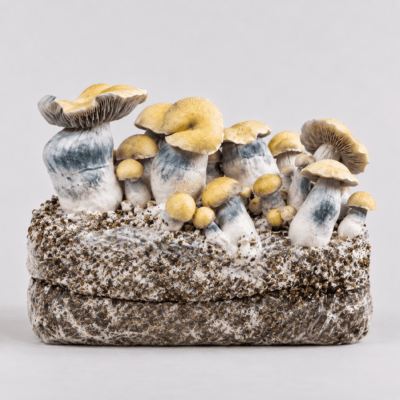
✓ In magazzino
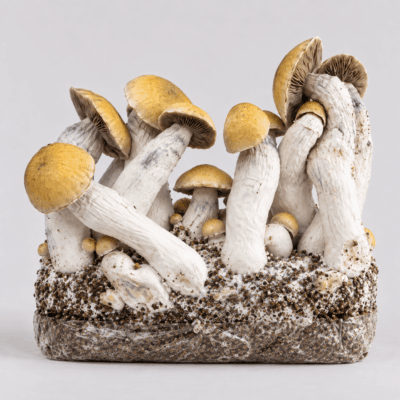
✓ In magazzino
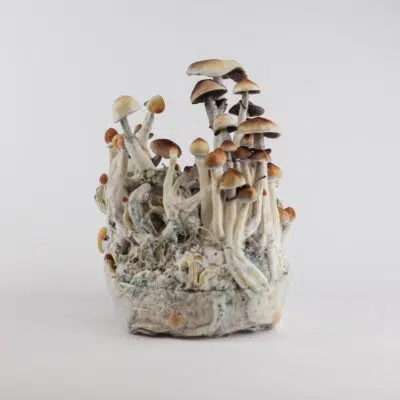
✓ In magazzino
✓ In magazzino
Manuale per il sacchetto "Ready-to-Grow"
This article provides a detailed explanation of the complete process. Keep the official manual available while using your bag so you can check each stage as your grow develops.
View or download the official Mondo Ready-to-Grow Bag Manual (PDF)
If you are still deciding between the two systems, read our comparison of Kit per la coltivazione di funghi allucinogeni vs sacchetti pronti per la coltivazione.
Domande frequenti
Sì. Il substrato è già stato inoculato a regola d'arte e completamente colonizzato prima della consegna. Non sono necessarie spore, colture liquide né alcuna attrezzatura per l'inoculazione.
No. L'inoculazione e l'incubazione sono già state effettuate in condizioni controllate. Il sacchetto è pronto per entrare immediatamente nella fase di fruttificazione.
No. Non bagnare la busta né il substrato. Collocare la busta ancora chiusa nelle condizioni di coltivazione raccomandate e attendere la comparsa dei primi germogli.
No. Tieni il sacchetto chiuso finché non compaiono i primi germogli. Aprire il sacchetto troppo presto fa fuoriuscire l’umidità e può rallentare lo sviluppo.
Avviare il ricambio d’aria non appena compaiono i primi segni. Staccare l’adesivo dall’angolo pretagliato, lasciare entrare brevemente aria fresca e poi richiudere l’apertura.
Cerca di effettuare da uno a tre brevi ricambi d'aria al giorno dopo la comparsa dei primi spilli. Al termine, ricopri sempre l'apertura con l'adesivo in modo che il sacchetto mantenga l'umidità.
No. Lascia l'elastico al suo posto per tutta la durata del processo di crescita. Mantiene la pellicola aderente al substrato e contribuisce a ridurre la formazione di germogli laterali.
No. Il sacchetto Mondo Ready-to-Grow non richiede ulteriori irrorazioni. L'aggiunta di acqua non necessaria può creare condizioni di eccessiva umidità e aumentare il rischio di problemi.
Mantenere una temperatura costante compresa tra 23 e 27 °C. Non superare mai i 27 °C e tenere la busta al riparo dalla luce solare diretta, dai termosifoni e da altre fonti di calore.
Sì. Posiziona il sacchetto in un luogo illuminato da luce indiretta e intensa. Non esporlo mai alla luce diretta del sole. Se non è disponibile una luce naturale adeguata, è possibile utilizzare una lampada per la coltivazione dei funghi.
Raccogli quando il velo sotto il cappello inizia a lacerarsi e il cappello comincia ad aprirsi. Evita di aspettare che tutti i cappelli siano completamente aperti e stiano rilasciando spore.
Utilizza delle forbici pulite per tagliare via l'intera parte superiore del sacchetto. In questo modo avrai spazio sufficiente per raccogliere i funghi senza schiacciarli né danneggiare il substrato.
Sì. Un sacchetto in buone condizioni può produrre ulteriori raccolti. Dopo la raccolta, rimuovere i residui dei funghi, chiudere bene l'apertura con una molletta o del nastro adesivo e riporre il sacchetto nelle stesse condizioni di coltivazione. I risultati e il numero di raccolti possono variare.
No. Il sacchetto Mondo Ready-to-Grow non deve essere messo a mollo tra un ciclo di raccolta e l’altro. Richiudere il sacchetto e riportarlo in condizioni adatte alla fruttificazione.
No. I funghi sono destinati a crescere direttamente all'interno del sacchetto in dotazione. Non spezzettare né trasferire il substrato colonizzato in un altro contenitore.
Tenere la busta chiusa e tenerla separata dagli altri prodotti della coltivazione. Scattare fotografie nitide della parte superiore e dei lati e visitare il Centro di risoluzione dei problemi di Mondo. Non tentare di pulire o recuperare il substrato contaminato.
Ready to start? Explore all Sacche Ready-to-Grow per Funghi Magici and choose the strain that best matches your experience and growing preferences.